
How to point DNS form Godaddy Domain to AWS Route 53


Hi Everyone.. ဒီကနေ့ကတော့ sharing လုပ်ပေးသွားမယ့်အရာကတော့ DNS အကြောင်းလေးပါ။
ကိုယ်တိုင်လဲတိုင်ပါတ်ခဲ့ရတော့ ဘဝတူများရှိရင်အသုံးဝင်အောင်ပါ။

Domain name ကို တခြား provider တခုစီကဝယ်ထားပြီး DNS record တွေကို AWS Route 53 မှာ manage လုပ်ချင်တယ်ဆိုရင် တော့ဒီ topic ကအဆင်ပြေမှာပါ။
အခု lab ကတော့ Godaddy နဲ့ လုပ်ထားတာဖြစ်ပြီး ကျန် တဲ့ provider တွေဆိုလဲ လုပ်ပုံလုပ်နည်းတူညီနိုင်ပါတယ်။

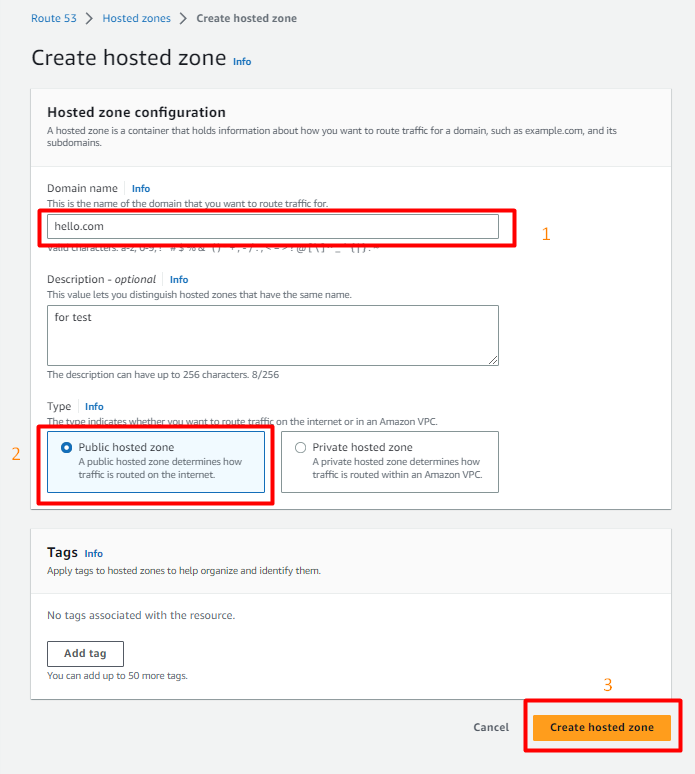
အရင်ဆုံး AWS Route 53 ကိုသွားပြီ Hosted Zone တခုဆောက်ပါ။

ကိုယ်ပိုင် domain name ေပးပါ။ description ကတော့မထည့်လဲရပေမယ့် အလေ့အကျင့်ဖြစ်အောင် ထည့်ပေးပါ။

Public domain ဖြစ်တဲ့အတွက် public hosted zone ကိုရွေးပေးရပါမည်။

Create Hosted zone ကိုclick ပါ။

ပြီးသွားရင် hosted zone ကိုရွေးပြီး click လိုက်ရင် ဒီအောက်က box လေးမြင်ရပါမည်။
ဒါဆိုရင် type မှာ NS ပါတာကိုရွေးလိုက်ရင် NS server name တွေကိုတွေ့ရမှာဖြစ်ပြီး
copy ထားပါ။

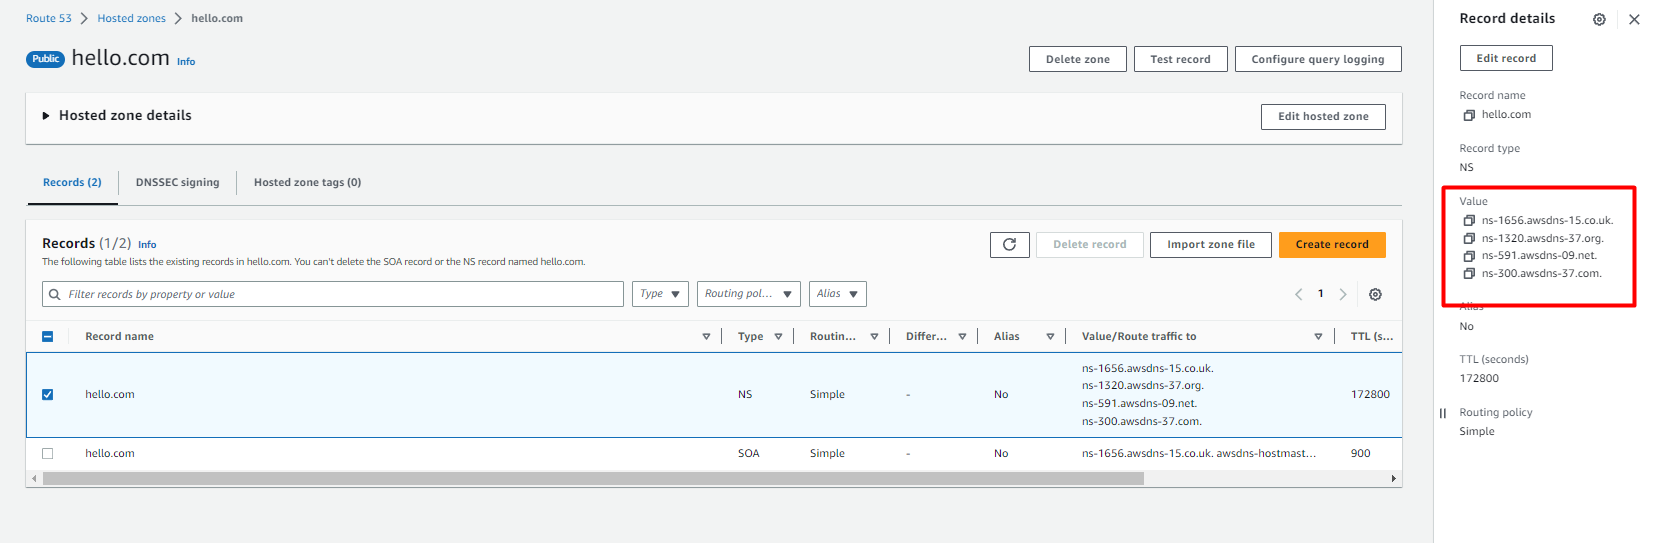
ဒါဆိုရင် AWS ဘက်ခြမ်းက လုပ်စရာတဝက်ပြီးသွားပြီဖြစ်လို့ Godaddy ကိုသွားကြပါစို့။

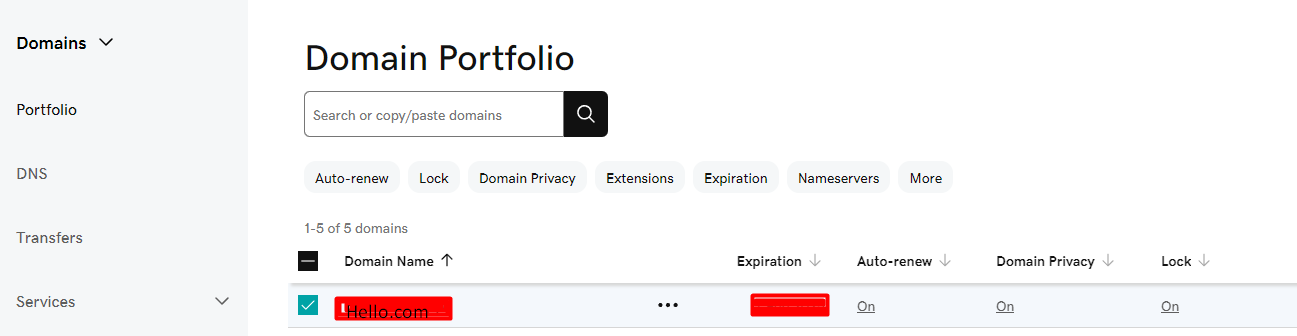
Godaddy မှာ account ကို login ဝင်ပြီး Domain ထဲက ကို့ domian ကို click ပါ။

DNS ထဲက Nameservers ကိုရွေးပြီး Change Nameservers ကို click ပါ။

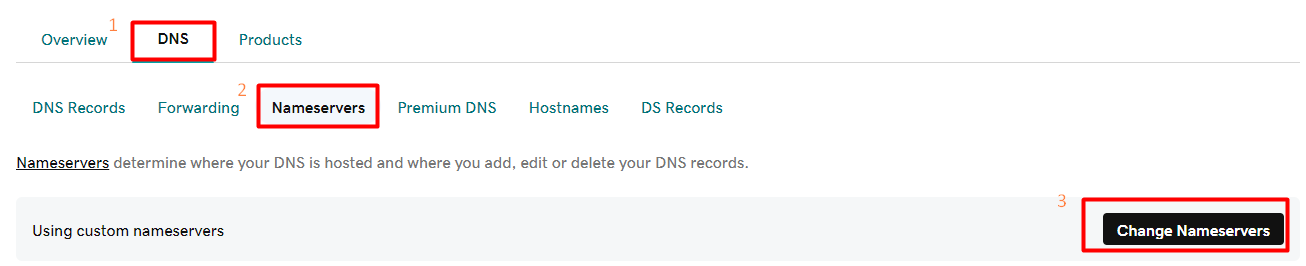
Domain name အသစ်ဆို ပြဿနာမရှိပေမယ့် ရှိပြီးသားတခုသတိထားဖို့လိုအပ်ပါတယ်။ မသေချာရင် DNS records tab မှာ ... Actions ကို click လိုက်ရင် Export Zone file ဆိုတာကို အရင် click ပြီး backup လုပ်ထားပါ။

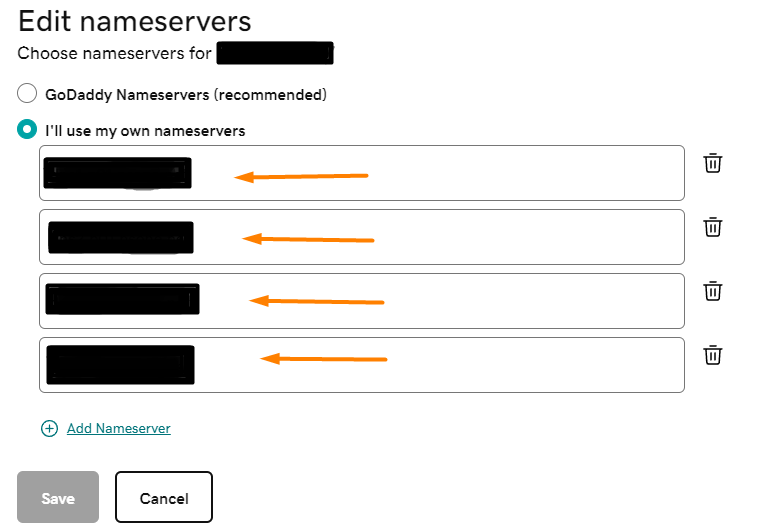
ပြီးရင်တော့ Nameservers tab က Change Nameservers ကို click ပါ။ အစက godaddy name server လုပ်ထားရင် "I'll use my own nameservers" ကိုရွေးပါ၊ confirm လာလုပ်ပါလိမ့်မယ်။

AWS route 53 ကကူးလာတဲ့ name server တွေကိုထည့်ပေးလိုက်ရင် တော့ Godaddy ကနေ AWS ကို DNS point လုပ်တာပြီးပါပြီ။

ကျန်တာကတော့ ကိုယ်သုံးမယ့်service ပေါ်မူတည်ပြီး AWS ရဲ့ Route 53မှာ DNS configuration ပြုလုပ်ရမှာပါ။

Thank you ...

Zaw

Comments

Popular posts from this blog

Access-list at SVI

SVI (Switch Virtual Interfaces) We use the SVI for inter vlan routing. In this scenario I will configure the access list with SVI. In this scenario I want to permit vlan 10 network to vlan 50 Server farm. Vlan 10 and vlan 20 can communicate each other. First create vlan and then interface vlan#. Switch(config)#vlan 10 Switch(config)#interface vlan 10 Switch(config-if)#ip address 192.168.10.254 255.255.255.0 Switch(config)#vlan 20 Switch(config)#interface vlan 20 Switch(config-if)#ip address 192.168.20.254 255.255.255.0 Switch(config)#vlan 50 Switch(config)#interface vlan 50 Switch(config-if)#ip address 192.168.50.254 255.255.255.0 when we finish the vlan interface create make sure the switch port are belong to each vlan. Port to vlan assign configure is Switch(config)#interface g0/1 Switch(config-if)#switchport access vlan 10 Switch(config)#interface g0/2 Switch(config-if)#switchport access vlan 20 Switch(config)#int...

OSPF Stub

The following restrictions apply to stub areas:     You cannot create a virtual link through a stub area.   A stub area cannot contain an AS boundary router.   You cannot configure the backbone as a stub area.   You cannot configure an area as both a stub area and an not-so-stubby area (NSSA). Ref : Juniper.net

OSPF Virtual Link

OSPF Virtual Link OSPF virtual link is use for that area far from backbone area 0. At this figure 1.1 area 2 is far from area 0 so area 2 can't reach other area. Figure 1.1 After configure OSPF, neighbor is up but router 2 don't see 3.3.3.0/24 network. R3#sh ip ospf nei Neighbor ID     Pri   State           Dead Time   Address         Interface 2.2.2.2           1   FULL/DR         00:00:39    10.1.2.1        FastEthernet0/0 R2#sh ip route      10.0.0.0/30 is subnetted, 2 subnets C       10.1.2.0 is directly connected, FastEthernet1/0 C       10.1.1.0 is directly connected, FastEthernet0/0 One of OSPF rule all area must connect to area 0.In this cause we can use virtual link at area 1. R2 router ospf 1  router-id 2.2.2.2  log-adjace...